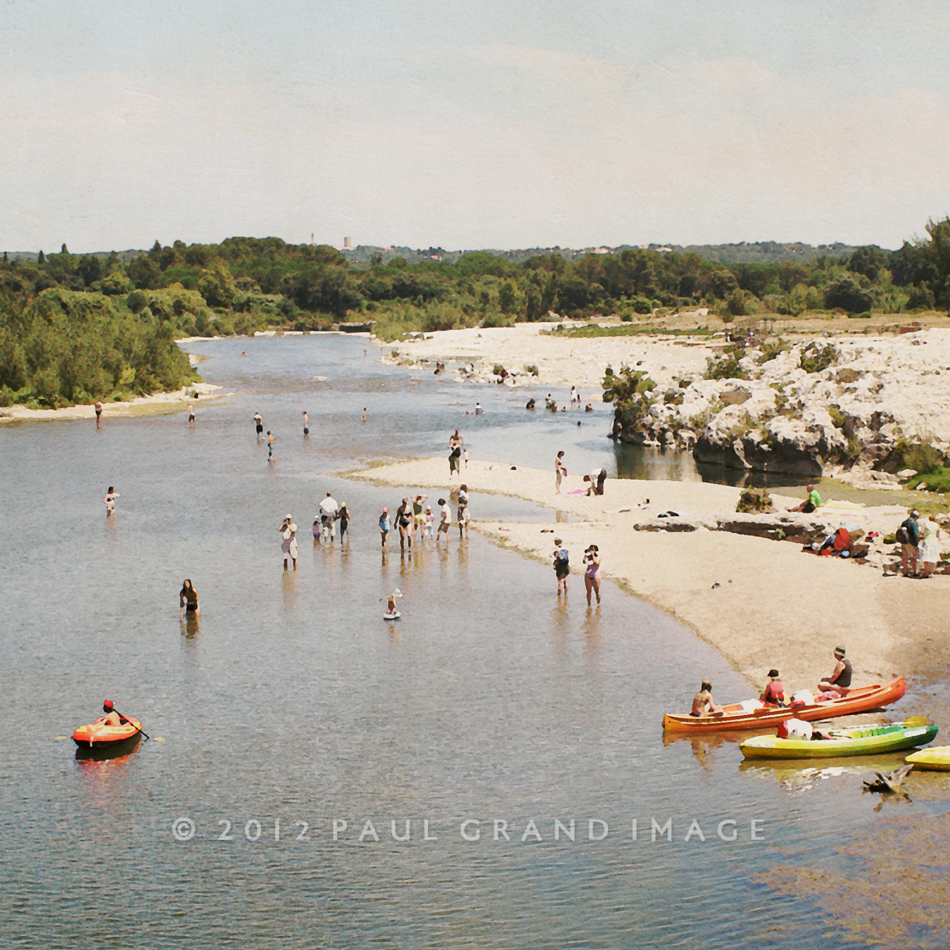
A couple of summers ago, I drove north east in search of Lavender fields, I didn’t get very far, as I was distracted by the gigantic Pont du Gard, which surely has to be the worlds most famous Roman Aqueduct! Unfortunately this is a view from the Aqueduct and not the landmark, which I’m sure everybody knows by now. I took this in June, in the over-bright mid afternoon sun, and because of this I never thought I’d be able to use it. However, with a fresh eye and by cropping two thirds of the image off, I could see potential. I pre-visualised the finished effect in a French Fauvist kind of style and set to work to get the popular painterly effect.
There are several ways to do this, but this is the way I did it.
Firstly, I ran the base image through the Lens sharpener program in CS5, just to get it tack sharp.
I then ran this sharper image through the CS5 HD Filter, to brighten and also degrade the image, with the detail slider @ around 15%.
Care should always be taken not to push this HDR filter too far as horrible halo effects show up, mostly on the skyline.
Applying textures can make this halo effect worse, so I always err on caution.
The base mouse-over has had the HDR effect already, however the bathers are probably recognisable to themselves in this clean state,
this is one of the reasons I tend to like the painterly effect, to disguise people, and thus not need a crowds release for Getty submitting!
Others try blurring faces, but that can look too contrived.
I tend to use the CS 5 watercolour filter most, but I also use Daubs and Oil, but both must be used with a light touch.
Here I used my usual finest brush settings;
Brush detail @ 45%
Shadow intensity @ 0
Texture slider @ 1
You can then fade this effect, and I normally just use 50% after fading.
Now the image is halfway there, it just needed beefing up with textures.
Some bright sunny textures work every time, like Pantheon Stone, and so I pulled this out first, I used it twice both at Overly @ 55%.
I then pulled out another, this time a spring painterly, Creme Anglaise, flipped vertically to get the darker part over the sky.
I used it twice, firstly with Color Dodge @ 22%, then a duplicated copy, multiplied also @ 22%.
The image was then far too washed out to I duplicated the Base image @ 55%
Here I could have finished but wanted a fresh clean watercolour final effect, and so I ran the merged images through Nik color effect pro,
choosing their top Pastel filter @ 8% – 67% – 26% slider levels.
I then used just 50% of this pastel final layer and merged.
Pantheon Stone – Overlay @ 55%
Pantheon Stone – Overlay @ 55%
Creme Anglaise – Color Dodge @ 22%
Creme Anglaise – multiplied @ 22%.
Base image-duplicated – Multiply @ 55%
Final colour clean up in Nik Color Pro as described and then I softened the over-sharp skyline with the Blur tool.
Please visit our Pack page or Combo Pack page to buy Flypaper Textures.