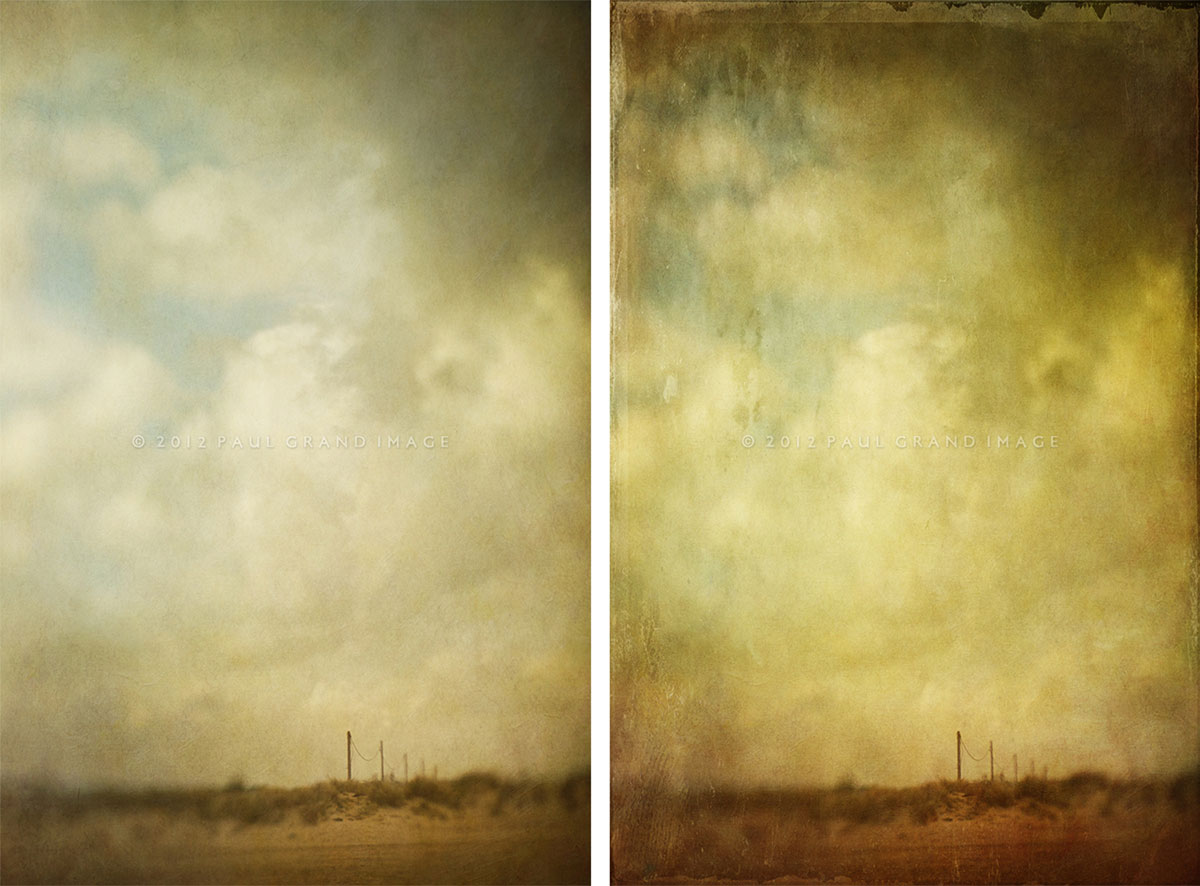
Today I wanted to show how I produced this textural feast of a picture using both texture panels of Russell Brown’s new Pro-panel.
Naturally I started off with first texture set 1 or if you have the Taster pack, they are the same textures but in a loose format.
Also, if you later want to print off your image or sell commercially, its always a good idea to save your PS files with the texture layers – unflattened, so that you can recreate the image with our full size textures without any risk of your final print quality being compromised.
Back on the beach, actually my first visit of the year after a colder winter than normal, shooting with my Lensbaby Optic 80, thinking the misty mostly cloudy afternoon might suit its moody effect. The scene shown is heading back to the volvo, the car hidden behind the dunes. I walked around the poles to get the background clouds just in the right spot, clicking all the time and checking the light settings on the fly. Back at home this shot jumped out as being interesting and not too blurred in the right place!
The Raw image is under the lefthand image, see how dark the exposure has to be to ensure the sky isn’t blown-out?
Thus I first I brightened it slightly in Nik color pro, using the detail enhancer filter and then the Lighten Center filter to highlight the pole and bottom beach area, finishing with a colour tweak. You’ll see the bottom is visibly brighter around the poles.
To get to the top left hand halfway stage I just used the textures from the 1st taster set.
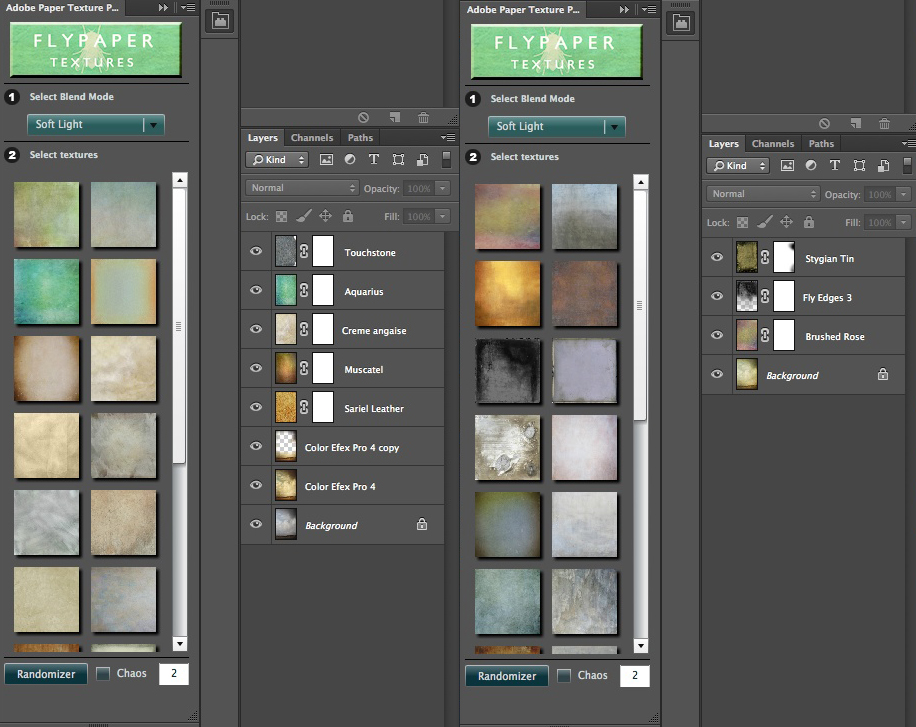
Here is the recipe:
Taster 1
Sariel Leather – Overlay @ 27% (right hand corners brushed away)
Muscatel – Soft Light @ 31%
Creme Anglaise – Soft Light 86%
Aquarius – Soft Light @ 48%
Touchstone – Soft Light @ 29%
I could have left it here, many would have, but I really wanted to beef up the depth, the heavy edges in taster 2 are designed to do just this, the base of the right-hand image is the midway point, see how the edges are clean at this point. We’ve added a couple of Glass Edges and an antique tintype, I used one of each as the recipe shows:
Taster 2
Brushed Rose – Soft Light @ 100% (right hand corners brushed away)
Fly Edges 3 – Soft Light @ 100%
Stygian Tin – Soft Light @ 63%
The result is a kind of Antique/Retro colour plate effect, possibly ok for illustrating one of those dust bowl depression era novels?
I could have carried on, many would have added a few birds, but I think it would have compromised its bleakness, over-egging it and turning it into kitsch.
Sariel Leather, Aquarius, Brushed Rose, Touchstone and Stygian Tin are from the Summer Painterly Pack, Creme Anglaise is from the Spring Painterly Pack and Fly Edge 3 is from the Fly Edges Pack
Please visit our Pack page or Combo Pack page to buy Flypaper Textures.
