I hope you’re all enjoying playing with the wonderful new Tintype Edges as much as we are. They’re going to be very versatile especially if you want an authentic vintage look. Paul and I have been experimenting with scanning things on our flatbed scanners and then texturing, scanning gives a very narrow depth of field and wonderful clarity, of course you could get the same result with lens wide open but scanning is so easy to do…and fun!
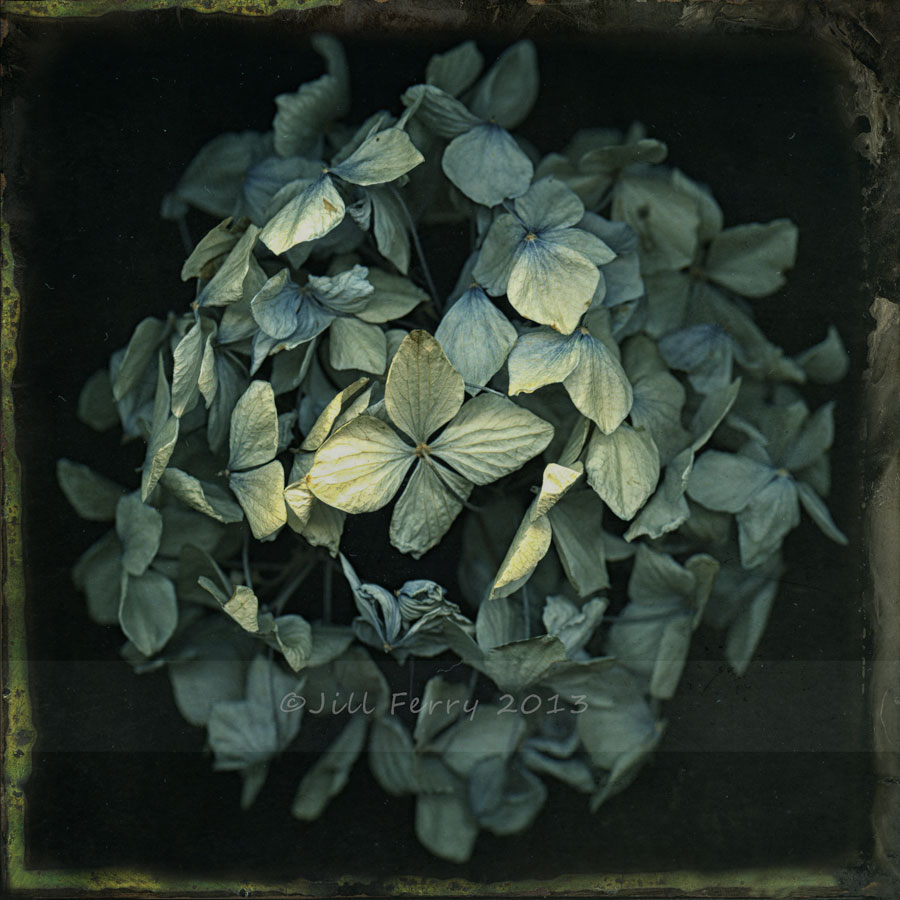
The original photo was scanned in tif with the scanner lid open, I then opened it in Photoshop. I actually did the preliminary processing of this one before we launched the pack and then revisited it yesterday, deciding to crop it closer than it had been originally, as a result I’ve cropped the edges off all of the lower tintype layers in the layer stack.
Anyway, the processing.
My bottom layer was a texture, in fact Tintype 30 @ Normal
Next came the Hydrangea @ soft light 100%
Copy of hydrangea which had been through Nik Color Efex cross balance filter to give it a bluer tone @ normal 68%
Copy of background Hydrangea @ Multiply 28%
Tintype 26 @ Soft light 67%
I then stamped visible Ctrl-Alt-Shift-E on my PC
And to increase detail I used the Nik Color Efex Dark Contrasts Filter to taste, this layer is @ Normal 40%
Tinytpe 28@ Lighten 100% masked from everything except the edge.
All textures are from the Tintype Edges pack.
And while we’re here, we’d like to highlight the wonderful work with the Tintype Edges done by our very own web designer Jason, go here to see!
Please visit our Pack page or Combo Pack page to buy Flypaper Textures.