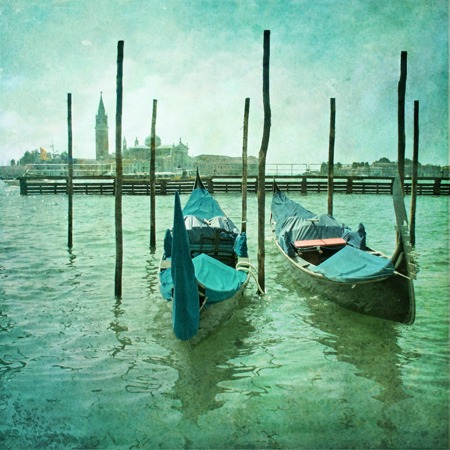
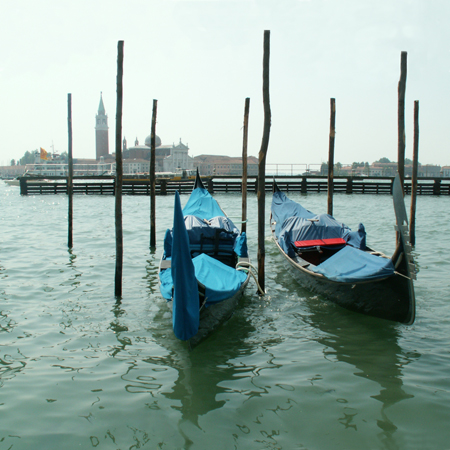
This shot, taken on the beautiful Venice waterways with a cheap Konica Minolta digital camera a few years ago without the aid of a much needed polarizer filter in the early summer sun was left unused until now, when I had the idea of extending the sky area and changing it into a square format from a dodgy landscape.
As you can see from this image, blown out skies shouldn’t be too much of a problem, if you want to go the painterly way!
When starting to rescue an image, try to start with the sky, for this reason we included several sky combination’s as summer skies often have this problem. Once the blown out areas of images are sorted you can start pulling the image together with all-over texture. As ever, my only problem is knowing when to stop!
I frequently go back to click off textures, to see if the result is better, often I’ll then remove a couple as I did here.
Finishing with Touchstone, my personal favorite texture, which was designed with skies in mind!
Firstly I duplicated and used a slight painterly effect.
The rest of the textures are used from the first listed to the last in CS4.
Duplicated base image – Normal @ 69% slight painterly effect with watercolour @ 10% and poster edges @ 4%
Pans Sky ~ Soft Light @ 100% (Over Sky and horizon only, brushed away from rest of image)
Pans Sky ~ Soft Light @ 100% desaturated (Over Sky and horizon only, brushed away from rest of image)
Verdigris Mist ~ Vivid Light @ 45%
Matmos Lake ~ Soft Light @ 100% (flipped vertically so the dark side is over the sky)
Mouse ~ Soft Light @ 70% (rotated so the dark side is over the sky)
Europium ~ Soft Light @ 42%
Touchstone ~ Overlay @ 100% (brushed away from gondolas)
A slight auto colour tweak to finish!
As ever, you can see the finished big version on my Flickr.
Please visit our Pack page or Combo Pack page to buy Flypaper Textures.

